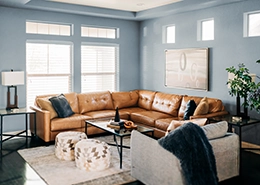
Preparing a room for a professional paint job requires much more than removing outlet covers, laying out drop cloths, and removing furniture. For a truly professional look, prep work may take as long, or longer, than actually painting the room. Rushing or skipping this part of painting a room is the most common DIY mistake.
There are many different steps that go into preparing a room for paint. Five Star Painting has outlined these steps below to help you on your next DIY project.
How to Paint a Room Like a Professional
Condition
The condition of the room will determine different preparation techniques. Is the room finished? Is there flooring installed? Is there HVAC? These factors and more will determine your preparation techniques.
For unfinished rooms during construction or a remodel, you won’t have to mask or cover as much. Finished rooms will require more prep work to protect items from paint. If the room is not conditioned, you’ll need to figure out how to heat or cool the room to help the paint cure properly.
Application
Spraying
Are you spraying the paint? Plan on covering every square inch of everything in the room with plastic. Spraying paint is a very effective method to paint a room, but it requires significantly more prep work, especially for homes that have furniture, finished flooring, and more. If you just have plywood or OSB subfloors you can get away with leaving these uncovered.
You’ll also need to mask off all the window trim (glass too!) and door trim. Even if you’re painting the walls and trim the same color, the trim should get a different sheen of paint than the walls.
Brushing and Rolling
Even for brushing and rolling paint, you’ll need to cover the floors and remove or cover any furniture in the room. To save time, our professionals move all the furniture into the middle of the room and cover it all with plastic. Don’t be tempted to leave furniture uncovered, even if it’s out of the way! It may seem unlikely that paint will spill on the sofa in the middle of the room, but it happens!
Wall Preparation
This may be the most important process for professional results. The more items you can remove from the wall, the less time you’ll spend masking and cutting in. Begin by removing outlet covers, light fixtures, thermostats, and HVAC vents. Put the screws back in the outlets to keep from losing them.
Trim Preparation
Now is the time to repair splintered or loose baseboards. Depending on the condition of the wood, it may be best to replace the baseboard instead of trying to fix it. You’ll need to head to the hardware store to find an exact match and use a miter saw and a brad nailer for a professional-looking installation.
Fix Damage
Next, you’ll need to fill holes, cracks, and sand down high spots. For drywall damage use spackle. For damage to wood trim use a high-quality wood filler. Raised drywall nails or screws poking up through the mud or cracked drywall seams require drywall-finishing techniques.
Sand
Using sandpaper, lightly scuff the walls, baseboards, and trim to prepare them for paint. We recommend using a bright light pointed at an angle against the wall (also known as rake lighting) to illuminate imperfections in the wall. Skip this step if your walls have texture.
Wash
Once the imperfections are filled and sanded, wash the walls, baseboards, and trim with warm soapy water. Don’t let the water sit—just wipe to remove dust and debris.
Prime
Once the spackle or drywall mud has had time to cure, be sure to prime it, or else it’ll show through the paint. Even if your paint is a primer and paint in one, we still recommend priming with a dedicated paint primer.
For bare drywall, use a dedicated primer to save paint and properly prepare the drywall.
Mask
Now it’s time to mask off areas for clean lines and straight edges. This is a tedious task, but necessary for DIYers. Professionals with a steady hand and years of experience sometimes skip this step and cut everything in by hand.
Caulking
Once the surface is smooth, seamless, and free of imperfections it’s time to caulk. Caulking baseboards and door trim is the extra step that makes a difference. But it can also make a mess and it’s easy to do a poor job. Cut the tip of the caulk smaller than you think it needs to be and puncture the caulk tube with wire instead of a nail or screwdriver to prevent stretching the tip out.
Take your time while you’re caulking gaps, and make sure you’re using a high-quality indoor paintable latex caulk. Keep a small bowl of soapy water near you while you caulk. If your caulk bead isn’t perfect, use a finger dipped in the soapy water to smooth it out.
Ready to Paint?
Not so fast! Before you open that can of paint, make sure you have all the right materials, the proper nap roller, and the correct type of brush. Oil-based paints require a natural bristle brush. For water-based paints, a synthetic brush is perfect.
Similarly, pair your roller nap and material to your paint and surface. Nap is the length of the fibers on the roller. Textured walls require more knap so paint is applied in the crevices and grooves. Rollers also come in two types: woven and knitted. Knitted rollers are best for rough surfaces and woven rollers will give you the smoothest finish.
A few other preparation tips include:
- If you’re spraying paint, shut off the HVAC temporarily to prevent paint from being sucked into your air ducts.
- You can’t spot mistakes if you can’t see them! Invest in bright, work lights to illuminate the work area, even if the house has interior lights.
- Instead of moving the ladder every few feet, scaffolding makes quick work of painting high areas and cutting in ceilings.
- Before you begin painting, make a plan for how you’re going to clean up and where you’ll wash the brushes and store your materials. It’s best to figure this out now before you’re worn out from a day of painting.
- Tack-ragging is a professional technique to pick up any remaining dust particles on trim before it’s painted with a special “sticky” rag. Wipe down trim with a tack rag just before you paint it for professional results.
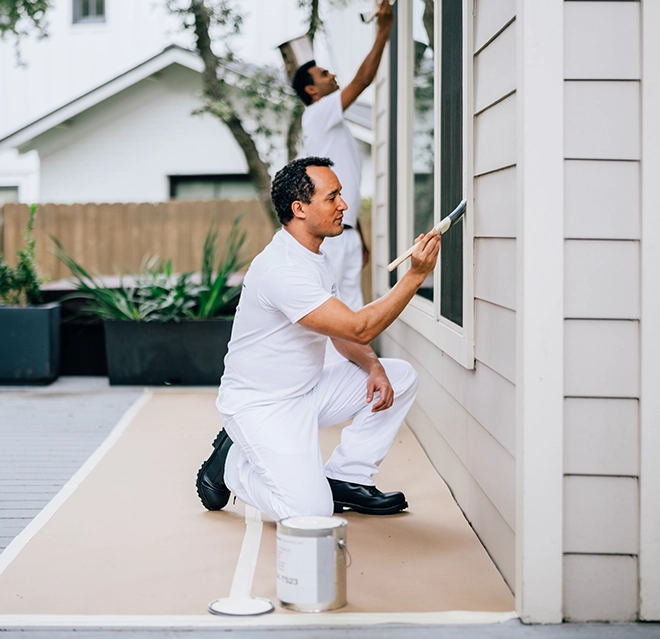
Let the Professionals Take Over
Painting a room is easy. Painting a room well and having it look like a professional job is hard. If you need help or would rather spend your free time doing something else, Five Star Painting can help. In most cases, the cost for materials and the time it takes to do it right offsets any perceived savings. Have you started a painting project and realized it’s too much to handle? We’re happy to pick up where you left off!
Our experts can also help you find the perfect color, prepare every surface, and take care of light carpentry work to ensure a long-lasting and great-looking finish.