Many painting projects require a plethora of supplies. If your walls and ceiling have dirt, nail pops, cracks, drywall damage, and wallpaper, you’ll need a lot more than just a roller and drop cloths for your project.
A system for storing those items together eliminates the need to search across the house for everything. In this post, I will share my ideas for organizing everything together before, during, and after a home painting project. These ideas are presented with a focus on interior painting, but some of them will apply to exterior painting supplies and projects as well.
Before the Project
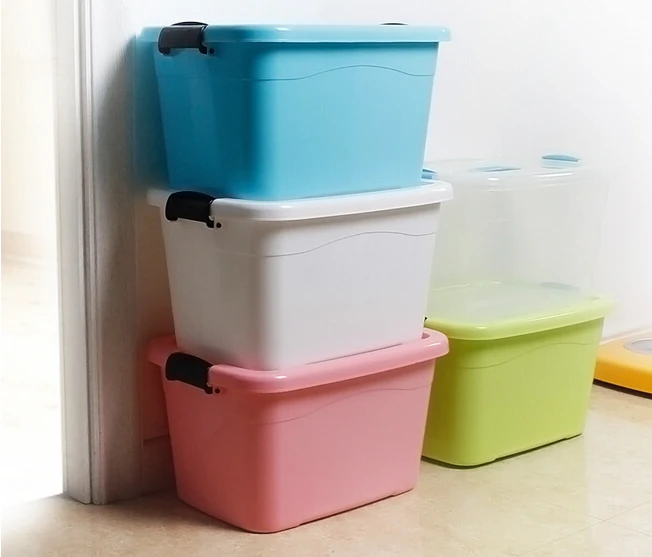
Bins
Since every painting project involves multiple steps, I like to break those steps into different storage bins. Storing everything in bins allows you to bring everything with you to the project area without needing to take multiple trips to the garage or basement. These three bins are labeled accordingly and can be stored in either of the two aforementioned rooms:
Project PrepHave a box for project prepping. This can include masking tape, drywall tape, prepaint cleaner, cleaning cloths, latex gloves, wallpaper scorer, scraper, box cutter, sanding sponge, tape measure, caulking gun, a wire brush, and anything else you’ll need.
Covering
Paint projects are messy and require a substantial covering to protect flooring, carpet, furniture, and pictures. So, you’ll want a separate tote to hold a lot of drop cloths and plastic covering.
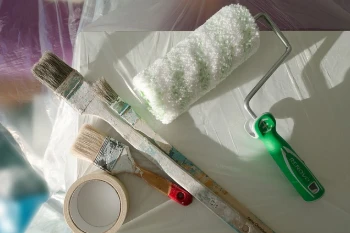
Brushes and Rollers
This is where you will keep plastic wrapped brushes, rollers, and trays together. You’ll want these separate from everything else so you don’t track paint splotches on other items.
Mudroom Drawer
For painting clothes, over-shoe booties, painting coveralls, goggles, and breathing masks, store those together in a drawer in the laundry room or mudroom closet. Since they are clothes, they will last longer when stored inside rather than the garage.
Toolbox or Slatwall

Find a place for your tools to live together since these will be used for a lot more than just painting projects. Power drills, sanders, hammers, and screwdriver sets are commonly used for fixing drywall. I like to keep mine stored in the case I bought them with. Power tool cases can be stored in a large toolbox or inside garage cabinets. If you don’t have cases, you can hang them on slatwall in the garage as well.
Long-term storage for all your supplies is effective when it’s easy to find. The remaining challenge is organizing everything so that clean up during and after a project is a breeze.
During the Project
Label Cans
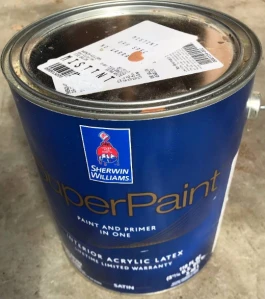
Before prepping each room, you’ll want to have all of your paint cans in order. Label paint cans by room and the part of the room it will be applied on. You can write with a marker over masking tape or use a labeler.
Also, a trick professional painters use is to put a splotch of paint on the lid of the can. This way you know exactly the color of the paint without needing to open it. You can do this or grab the color swatch when you purchase the paint and tape it to the top of the can.
Another method to use instead of writing on top of cans is to label the walls and trim with masking tape and write the paint and color being used on it that is found on the can’s label.
Control the Mess
Cover the floor with plastic or drop cloths. Protect surfaces that won’t be painted by taping around the edges and/or wrapping them in plastic covering.
Using one of the cardboard boxes that came with purchasing the paint, place in light switch plates and screws. Label each switch plate box by room with masking tape and a marker.
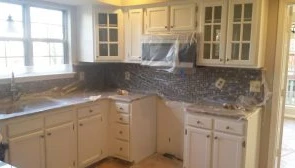
The same cardboard box method can be used when painting cabinets. A box can hold the knobs, hinges, and screws until the paint has dried.
Have empty buckets on hand to hold brushes and rollers when they aren’t being used. Make sure to clean these out at the end of the project as best you can for reuse.
After Finishing the Project
After painting, wash out brushes and rollers, dry them, and store them in their protective cover. If you don’t have their original cover, then wrap them in a plastic bag that’s taped to the handle. Once covered, you can store them all together back in the bin.
Storing and Disposing Paint Properly
Now comes the task of where to store the paint you want to keep. Most homeowners are tempted to store their paint in the garage or a shed. Avoid doing this. Cold temperatures will freeze the paint and make it clumpy and hot temperatures above 90 degrees will dry out the paint in the can.
The best place to store paint is under temperature-control in a storage room, closet, or in the basement. Buy some steel shelves at Costco. Those are just a little over $100 and they will be strong enough to hold all the paint so you’ll have it on-hand later for touch-ups.
Use a rubber mallet to re-seal the paint can lid. If you have less than half a can of paint to store, you can also consolidate your paint in large mason jars so they take up less space.
Then store the paint together on the shelves. Keep the heaviest cans on the bottom.
For any paint cans, you don’t want to keep, mix the remaining paint inside with kitty litter and throw them away or check online for local county recycling events.
Any sort of compound that isn’t paint like drywall mud, caulk, and repair putty can be stored together on a shelf in the basement or storage closet as well.
Cleaning the Project Area
Once the paint is taken care of, the last few steps of clean up are:
- Remove masking tape before the paint dries. Otherwise, carefully score at the edge of the tape so dried paint doesn’t come off.
- Drop cloths that are worn out or are too messy to reuse can be thrown away. Covering and cloths that can be reused are to be rolled up and stored.
- Vacuum dirt and dust.
And you’re done! No one said a home painting project would be a completely clean one. With the right systems in place, the mess is controlled and you won’t have to spend time finding tools or screws for switch plates. All it takes is a little bit of labeling and a few bins.
Michael Nokes works for Garage Design Source, a garage storage and organization dealer that serves the DC metro area. He enjoys sharing home organizing tips and helping others with decluttering. When he’s not working, he spends time with friends and family.