Five Star Painting explains how to remove painted popcorn ceilings effectively.
|
Through the mid-70s and 80’s, popcorn ceilings became the rage in many homes across the country. Often referred to as stucco, cottage cheese, or acoustical ceilings, people installed these surfaces to provide sound absorption or to hide flaws and imperfections, inexpensively. If you have an older home, you may have a popcorn ceiling or two that hurts your eyes to look at every day. The good thing is that you can rid your home of this appearance.
Get a fresh look by covering the ceiling with new material, such as drywall, paneling or decorative tin tiles. You can also choose to remove the popcorn ceiling entirely. However, before you proceed with removal, read the following considerations to ensure that you understand what this project involves.
Test Material for Hazards
You should know that any acoustic texture material manufactured before 1980 may contain asbestos. Before you remove a popcorn ceiling, test a small sample of the material to determine if it contains asbestos. Keep in mind, that asbestos that remains intact does not pose a health risk. However, disturbing this hazardous material can cause fibers to become airborne and prone to become trapped in your lungs. This can lead to very serious health risks.
You can buy a home test kit, which requires you to scrape a small amount of ceiling texture into a sealable plastic bag and send the sample to a testing lab. To avoid any potential health risk involved in taking a sample, simply contact an authorized testing service to come to your home to perform the test. If you find that your textured ceiling material contains more than 1% asbestos you have three options:
- Have the popcorn ceiling removed by a certified asbestos abatement company
- Do not disturb the ceiling in place.
- Encapsulate the ceiling with another material.
Besides testing for the possible presence of asbestos, many professionals recommend that you also conduct a lead paint test, especially if you have young children in your household. Check your state laws to learn what your responsibilities are for testing for the presence of hazardous materials.
Removing a Painted Popcorn Ceiling
Although removing those lumps and bumps from your ceiling is not a difficult project it does require some time and muscle. Make sure that you wear an appropriate dust mask or respirator, goggles and other protective clothing.
Removing popcorn ceiling is one thing, but removing popcorn ceiling that’s been painted is entirely another. You’ll still be able to remove it, but it will be slightly more challenging, as paint adheres to the ceiling and acts as a sealant. You’ll need to spend additional time breaking down the paint before removing the material.
To prepare the room, its best to remove the furniture if possible. Make sure that you turn off the heating and cooling system and close off and cover all vents, using plastic and painter’s tape.
Also, cover (remove) light fixtures, outlets and wall switches. Protect floors with plastic or rosin paper extended about 12 inches up the side of the walls, and attach with painter’s tape. Follow these steps for removing a painted popcorn ceiling:
- To help breakdown the paint, spray a mixture of one part vinegar to ten parts water on the surface of the ceiling.
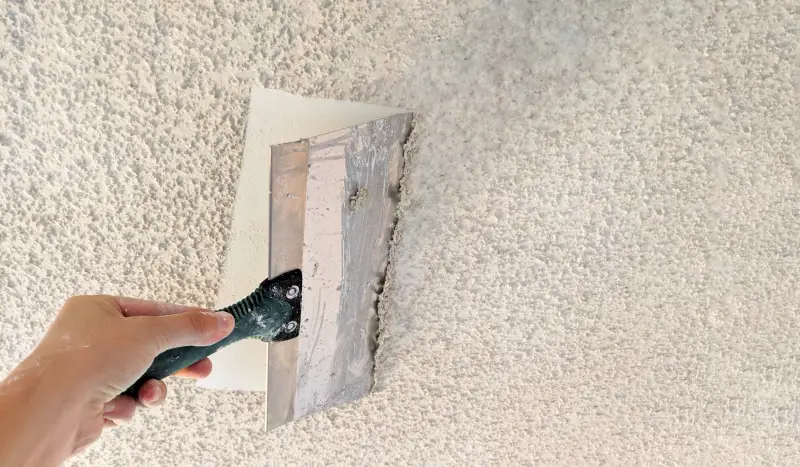
- Use a 4-inch utility knife/type scraper to remove the material. This method is messy and slow, but it works. Make sure that you saturate the surface so that the solution penetrates and allows you to easily scrape away the material.
Try alleviating some of the strain of working overhead by attaching the scraper to a pole.
*Popcorn ceiling removal service is not available in all states without proper licensure or certification, including Washington.
Prepare the Surface for Painting
Now that you removed the popcorn texture, you can start prepping the new surface for a fresh coat of paint. Proceed as you would for any project. Sand the surface of the ceiling with a drywall sanding stick. Fill any imperfections as needed. After you apply a quality coat of primer, you're ready to paint.
Need professional help with updating your ceilings or a painting project? Schedule a free estimate with your local pros at Five Star Painting. Once you've removed the popcorn ceiling, you'll want to get rid of any water leak stains, and maybe update the ceiling fans too!
This article is intended for general informational purposes only and may not be applicable to every situation. You are responsible for determining the proper course of action for your home and property. Five Star Painting is not responsible for any damages that occur as a result of this blog content or your actions. For the most accurate guidance, contact the Five Star Painting location nearest you for a comprehensive, on-site assessment.
FAQs About Removing Popcorn Ceiling
Our years of experience, attention to detail, and decades-long commitment to exceptional customer service set Five Star Painting apart from the competition. Continuing this high standard also includes using our knowledge and experience to answer your most frequently asked questions about removing painted popcorn ceilings.
Can I remove a painted popcorn ceiling without damaging the drywall?
Removing painted popcorn ceiling without damaging the drywall is a challenging task, but it's possible with careful preparation and technique.
Challenges of removing painted popcorn ceilings:
- Paint barrier: Paint creates a barrier that prevents water from effectively soaking into the popcorn texture, making it much harder to scrape off. This significantly increases the risk of damaging the underlying drywall when attempting removal.
- Increased difficulty: Painted popcorn ceilings often require more force to remove, which can lead to gouges and tears in the drywall paper.
Removing painted popcorn ceiling is a labor-intensive process that demands patience and precision. While drywall damage is possible, careful technique and thorough preparation can minimize it.
Key steps required in removing painted popcorn ceilings:
- Prepare and protect the area: Thoroughly cover floors and walls with plastic sheeting to protect them from debris. Turn off the power and remove light fixtures and ceiling fans.
- Test dry and wet scraping: Begin by testing a small area. If the dry popcorn comes off easily, proceed with dry scraping. If dry scraping fails, cautiously apply water with a sprayer, allowing it to soak in before scraping. However, be aware that excessive water can damage drywall. It is very possible that a chemical paint stripper may be needed. If so, always follow the manufacturer's instructions and take all recommended safety precautions.
- Scrape carefully: Use a wide drywall knife or scraper and apply gentle, even pressure to minimize damage. Be especially careful around seams and corners.
- Repair damage: Expect to have some drywall damage. Be prepared to patch and smooth any gouges or tears with drywall compound. Sanding will be needed to smooth the repaired areas.
Be aware of any risk of asbestos. If your home was built before 1980, have the popcorn ceiling tested for asbestos before attempting removal. Asbestos is a hazardous material that requires professional abatement.
Because there are so many considerations when removing popcorn ceilings, it’s best to consult with a removal professional from your local Five Star Painting team. Not only can we help get rid of your current popcorn ceiling, but we’re experts at repainting popcorn ceilings as well.
Is it safe to remove a popcorn ceiling myself?
Whether you can safely remove a popcorn ceiling yourself depends on a few critical factors, primarily the age of your home and your DIY skill level. Homes built before the 1980s often contain asbestos in their popcorn ceilings, a hazardous material that requires professional abatement. Disturbing asbestos can release harmful fibers into the air, posing serious health risks.
Even if your ceiling is asbestos-free, removing painted popcorn ceiling is messy, labor-intensive, and carries a significant risk of drywall damage. Improper DIY techniques can lead to costly repairs, and the dust generated can be difficult to contain.
While DIY projects can be satisfying and may seem cost-efficient, popcorn ceiling removal often exceeds the average homeowner's capabilities. It demands specialized tools, safety equipment, and expertise to avoid costly mistakes.
Instead of risking your health and your home's integrity, consider contacting your local Five Star Painting. Our professionals have the experience and equipment to safely and efficiently remove your popcorn ceiling, ensuring a smooth, damage-free finish. We'll handle the entire process, from proper containment to meticulous cleanup, leaving you with a beautiful, modern ceiling and peace of mind. Let Five Star Painting take the stress out of your ceiling renewal project.
What’s the fastest way to remove a painted popcorn ceiling?
The fastest way to remove a painted popcorn ceiling requires striking a delicate balance between speed and minimizing drywall damage, as these two goals can conflict. There's no single magic bullet, but a combination of techniques and tools can expedite the process.
Here are some key factors that will speed up the process of removing a painted popcorn ceiling:
- Proper preparation: Thoroughly cover the room with plastic sheeting to save significant cleanup time. Turn off the power and remove light fixtures and ceiling fans beforehand to ensure uninterrupted work.
- Effective wetting: Use a pump sprayer to apply warm water mixed with a small amount of dish soap to penetrate the paint and loosen the texture. Allowing sufficient soaking time is crucial. Don't rush this step. A garden sprayer can wet large areas quickly, but this option should be used with care to avoid overwetting.
- Scraping technique: Use a wide, flexible drywall scraper (6–12 inches) to cover larger areas with each pass. Apply consistent, moderate pressure and avoid excessive force, which can damage the drywall.
- Chemical strippers: If water methods fail, chemical paint strippers designed for ceilings may be used. These can dramatically speed up the process but require careful handling and ventilation.
- Teamwork: A helper to assist with wetting and scraping can significantly reduce the overall time.
If you’re considering repainting the popcorn ceiling, be careful not to damage the drywall, as repairs could add significant delays to your project. Of course, speed should never compromise safety. Always prioritize proper safety precautions, including wearing a respirator and eye protection. For professional popcorn ceiling removal that saves you the time, hassle, and risk of DIY, simply contact your local Five Star Painting team.