Five Star Painting explains how to paint wood paneling for a fresh, modern look.
|
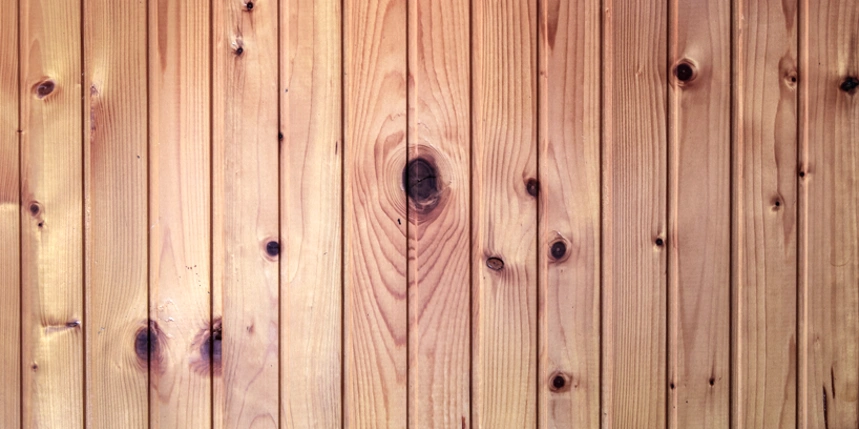
If one or more rooms in your home have paneling that is damaged, is of poor quality, or no longer matches your decor there are two options: removing it or painting it. Painting over wood paneling is the most economical and simplest solution, and the experienced professionals at Five Star Painting can help to ensure the success of your project and your satisfaction with the outcome, with expert tips for how to paint wood paneling.
Tools and Materials
You will need:
- Dropcloths
- Trisodium phosphate (TSP)
- 220 grit sandpaper
- 100 grit sandpaper (optional)
- Joint compound
- Putty knife
- Foam paint roller (primer)
- Lint-free cloths
- Stainblocking primer
- Bucket
- Sponges
- Painter's tape
- Goggles
- Rubber gloves
- Interior paint
- Respiratory mask
- Angled paint brush
- Paint tray and roller
How to Paint Over Wood Paneling
Follow our step-by-step guide to painting over wood paneling, including filling in any grooves or areas of damage. Before you begin, be sure to lay down drop cloths to protect your floors:
Clean the Paneling
Paint won't adhere properly to a surface that is dirty, oily, or dusty, making this first step an important one. You can remove surface dust with a damp, lint-free cloth or microfiber duster, but anything more will require the use of diluted TSP and some elbow grease. Ensure you have adequate ventilation before you begin cleaning and be sure to wear protective gloves, eyewear, and respiratory equipment throughout the process. Mix the TSP with water in accordance with the directions on the package and wipe down walls using a dampened sponge or cloth.
Lightly Sand the Surface
Whether or not you intend to fill in any holes or grooves in the paneling it is important to sand or scuff up the surface of the wood to ensure proper adhesion, smooth out any rough spots, and remove the protective coating or glossy finish. Use a 220 grit sandpaper and work in a circular motion, applying a light, even pressure. Remove dust from the surface using a lint-free cloth, damp rag, or vacuum and upholstery attachment, and vacuum the floor area afterward to prevent tracking.
Fill in the Grooves
Apply the compound to the putty knife and begin at the top, scraping downwards to fill the groove. Follow up with a second, clean putty knife dipped in water to remove any excess and smooth out the compound. Repeat with each groove and allow the paneling to dry before sanding a second time, using 100-grit sandpaper to ensure the compound is flush with the paneling.
Apply Primer
Use a high-quality, stain-blocking latex primer for solid wood paneling and an oil-based primer for veneer. Use a brush to cut in the corners, along the ceiling, and baseboards, and a foam roller to apply a thin coat to the rest of the paneling. Read the label to determine how much time to wait before applying a second thin coat.
Paint the Paneling
When choosing paint, we would recommend a similar type that you might choose for painting cabinets, such as Emerald Enamel, but in a flat finish, rolled on. Latex wall paint would also do the job, but keep in mind, it will not be as durable, so you should consider what kind of environment the paneling will encounter when selecting your paint. Apply the paint of your choosing, opting for two thin coats. Begin by cutting in the corners, ceiling, and baseboards, and be sure to remove any paint that gathers in the gaps between the panels or in the panel grooves, using a dry brush. Allow the paint to dry in between coats.
Once you have put a fresh coat of paint over your outdated or dark wood paneling, you can further enhance the look and feel of your room by updating your windows with expert repair and installation services from the Glass Doctor. Five Star Painting today for help with all your interior and exterior painting projects, or call us at (888) 261-3633 to receive an estimate.