Five Star Painting explains how to repair stucco effectively.
|
Stucco Repair
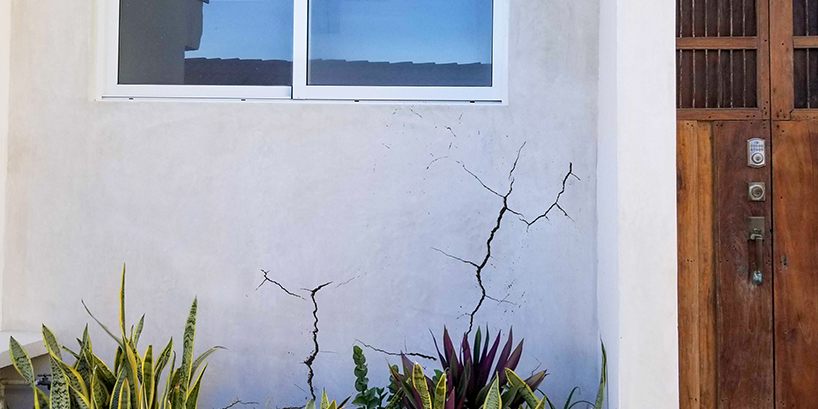
Stucco is a resilient and great-looking wall finish. It’s the perfect exterior siding choice for arid climates because it does not do well with excessive moisture or precipitation. And it’s not just for exterior walls; interior stucco walls are a unique design element and a great solution for covering up plaster walls that are deteriorating. Although stucco is low maintenance, homeowners shouldn’t be surprised if their stucco cracks.
Cracks in stucco should be repaired as soon as possible to prevent the crack from growing and water getting behind the wall. Stucco cracks for several reasons, and fortunately there are easy ways to repair it. Learn more from the experts at Five Star Painting.
What Causes Stucco to Crack?
Stucco cracks are very common due to the natural movement and expansion that happens in the ground and around homes. Stucco can also crack for other reasons, such as:
- Old stucco
- House and foundation settling
- Improper installation that did not allow for expansion of the stucco
- Lack of weep screed installation, which helps moisture escape the wall above the foundation
- Stucco that was applied too thin – exterior stucco walls should be a minimum of 7/8 inches thick
How to Repair Stucco
Stucco crack repair will depend on the depth, length, and cause of the crack. Hairline cracks and cracks less than a 1/4 inch are easy DIY repair. This repair technique is best if you’re painting the wall after the repair. If you’re not painting the wall, you’ll need to quickly remove any caulk that lands outside the crack. For best results, we recommend painting the repair area.
You’ll need a tube of paintable masonry caulk, which you can find at your local hardware store. Apply this caulk to a clean and dry crack while following the tips below:
Tips for Caulking Cracked Stucco
- Always caulk in the morning before the sun has a chance to heat the stucco wall, which can shrink the cracks.
- Apply a generous bead of caulk, and don’t worry about the caulk on the wall outside the crack.
- Once the caulk is applied, use your hand with a rubber glove dipped in soapy water to push the caulk into the crack. You may use a damp foam stucco float if you have one, but your hand works, too! Use a circular motion and “buff” the caulk into the crack.
- If the caulk falls into the crack void while you’re doing this, simply apply more.
- Next, gently press the ends of a stiff bristle nylon brush into the caulk before it cures to give it a textured appearance. You can skip this step if you use textured masonry caulk, which has sand in it.
- Allow the caulk to dry and apply more if it shrank during the curing process.
- Once the caulk has cured, it’s ready for paint! Check out our guide to painting stucco for best results.
Large Stucco Crack Repair
Repairing cracks larger than a 1/4 inch is a professional job since it requires mixing fresh stucco. A professional should assess the area and determine why the stucco cracked to prevent it from happening again and keep the problem from returning. This could include reinforcing the wall or adding expansion joints or a weep screed. They’ll also be able to determine the type of stucco used and color match the new stucco so it blends into the wall or paint it to match.
Stucco Repair Near Me
Looking to update the exterior of your home and take care of some preventative maintenance at the same time? Minor stucco repair is always part of our exterior and interior painting services. We’ll take care of all the prep work, repair damaged areas, and can even help you find that perfect color. Give us a call at (888) 261-3633 or request a free estimate online!