Five Star Painting explains how to paint over polyurethane surfaces.
|
Trends in home décor change quickly and often, and painting is the most cost effective and easiest way to keep up with them.
But when items have a coat of polyurethane, which forms a plastic-like surface that resists paint, what can you do?
The answer is simple: painting over polyurethane requires that you properly prepare the wood or other type of surface. And that’s good news considering it’s one of the most popular materials used in home furnishings like tables, bedding, cabinets, and more.
Keep in mind that if you don’t prepare the polyurethane surface, all the paint you apply will end up peeling off your project, which is a huge waste of your time and effort.
Read on to learn about polyurethane, the materials needed to paint over it, and how to complete the process successfully:
- What polyurethane is?
- Recommended supplies for painting over polyurethane.
- How to paint over polyurethane.
What Polyurethane Is
Polyurethane creates a hard, durable topcoat that is put on a variety of materials, like kitchen cabinets, to help protect the wood from scratches and scuffing. It can also be found on wood floors, doors, and furniture.
Polyurethane creates a high-gloss finish — and it’s usually applied in multiple coats to ensure a strong barrier is formed.
Repainting kitchen cabinets that have this finish is the most common challenge for DIYers, so we’ll focus on that type of project in this article.
Recommended Supplies for Painting Over Polyurethane
Along with a little elbow grease, making sure you have everything you need will make your project go that much smoother and result in a project you’re happy with.
Some common supplies used for painting over polyurethane:
- Clean, lint-free cloths
- Mineral spirits
- Wood filler
- Protective face mask
- Gloves
- Protective eyewear
- Fine-grade sandpaper
- Liquid sandpaper (optional)
- Paintbrushes
- Oil-based primer
- Oil-based paint*
*A secondary option to consider is acrylic urethane topcoats for painting trim if you can’t find oil-based paint.
Once you’ve gathered all your tools and supplies, it’s time to begin!
How to Paint Over Polyurethane
Many homeowners wonder if they can paint over polyurethane without sanding. Although sanding is the most tedious part of this project, it’s also the most important. Always sand the polyurethane before painting. If you don’t invest time in sanding, your paint over polyurethane project won’t be a success.
Although these how-to painting steps are for kitchen cabinets, they also can be applied to wood floors, doors, or furniture that have a polyurethane finish on them.
Step 1: Safety First
- Always read the labels of the products you are using and follow the recommended safety guidelines. If the product calls for it, wear protective gear such as gloves, a mask, and eyewear to keep your hands, lungs, and eyes protected.
- Whether you’re sanding or painting, always work in a ventilated area.
Step 2: Remove Cabinet Doors, Drawers, and Hardware
- Remove the cabinet knobs and any other hardware.
- If you only have a few cabinets, you can leave the doors in place — otherwise, remove them.
Step 3: Clean and Sand the Surface of the Kitchen Cabinets
- Use mineral spirits to clean the cabinet, wiping it in a circular motion with a clean cloth or rag. This will remove dirt, grime, and stains from the door, allowing for a better paint finish. Use wood filler to fill in any gaps or scratches.
- Sand the surface of the wood: Use fine-grade sandpaper to remove the polyurethane from the cabinet door. You don’t need to remove all of it, just enough that the new paint will adhere to the wood. Continually remove any dust with a clean cloth and mineral spirits. Take your time; this is a very tedious part of the project, but it’s the most important step in preparing the surface for paint.
- Liquid sandpaper alternatively also works well for removing a polyurethane topcoat from cabinet doors. Apply using the directions on the bottle.
Step 4: Prime the Surface
- Apply oil-based paint primer. Using a primer will give your paint a better surface to stick to. The primer also keeps any stains on the wood from coming through the paint.
- Allow the primer to dry overnight for best results. Another coat may be necessary if any wood grain or stain shows through the primer.
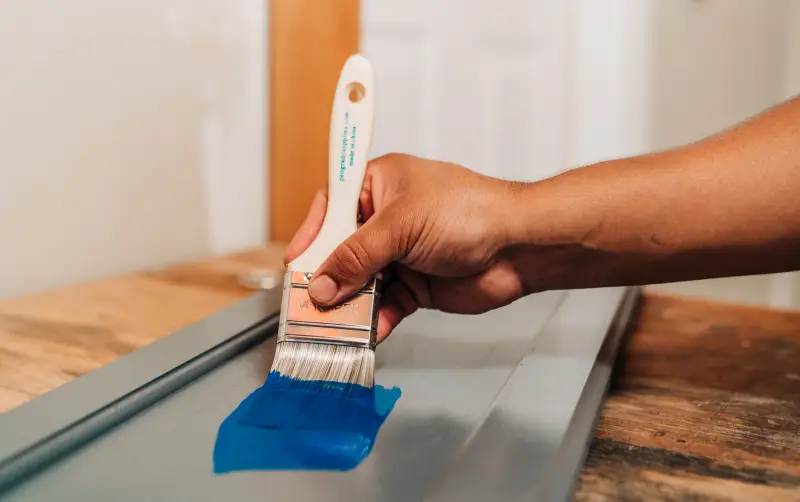
Step 5: Paint the Surface
- Paint the first coat and allow it to dry overnight.
- Apply a second coat to make sure the cabinet door is fully painted. Allow this layer to dry for up to 72 hours before adding any hardware.
Professional Help When You Need It
While painting over polyurethane is doable, it is a process that requires some time and effort. However, when done well, it can rejuvenate old-looking cabinets, furniture, and other surfaces. If you like the idea of painting over polyurethane, but don’t want to invest the time and effort, contact the experts at your local Five Star Painting for professional kitchen cabinet painting services. We have the experience, expertise, and attention to detail to get the job done right! Call today or connect with us online for a free estimate.
This article is intended for general informational purposes only and may not be applicable to every situation. You are responsible for determining the proper course of action for your home and property. Five Star Painting is not responsible for any damages that occur as a result of this blog content or your actions. For the most accurate guidance, contact the Five Star Painting location nearest you for a comprehensive, on-site assessment.
FAQs About Painting Polyurethane
Our years of experience, attention to detail, and decades-long commitment to exceptional customer service set Five Star Painting apart from the competition. Continuing this high standard also includes using our knowledge and experience to answer your most frequently asked questions about painting polyurethane.
Can I paint over polyurethane without sanding?
While you can paint polyurethane and matte urethane without sanding, professionals recommend that you do sand first for a durable and aesthetically pleasing finish. Polyurethane creates a hard, glossy, and non-porous surface that paint struggles to adhere to. Without proper preparation, the new paint is likely to chip, peel, and scratch easily, leading to a disappointing and short-lived result.
Here's what you should do:
- Clean the surface: Thoroughly clean the polyurethane surface with a degreasing cleaner to remove any dirt, dust, grease, or wax.
- Lightly sand: Use fine-grit sandpaper (220–320 grit) to lightly scuff the entire surface. The goal is not to remove the polyurethane but to create a slightly abraded surface.
- Wipe away sanding dust: Use a tack cloth or damp rag to remove all sanding dust.
- Apply a bonding primer: Use a high-quality bonding primer specifically designed for slick surfaces. Allow it to dry completely according to the manufacturer's instructions.
- Apply your chosen paint: Apply your desired paint in thin, even coats, allowing each coat to dry thoroughly before applying the next.
Sanding creates microscopic scratches, providing the paint with “tooth” to grip onto. This mechanical adhesion is important for the longevity of your paint job. Skipping this step significantly compromises the bond between the polyurethane and the new paint layer.
While some specialized primers claim to adhere to glossy surfaces, even these often benefit from light sanding for optimal performance. For best results and a finish that will last, taking the time to properly prepare the surface before painting polyurethane is well worth the effort.
What kind of paint works best over polyurethane?
Oil-based paints are often recommended for painting over polyurethane or matte urethane due to their strong adhesion properties. However, high-quality acrylic latex paints can also work well, especially when paired with a bonding primer specifically designed for slick finishes.
When choosing a paint, consider the intended use of the painted surface. Oil-based paints generally offer superior hardness and resistance to wear, making them great for high-traffic areas. Regardless of the paint type, ensure proper surface preparation, including cleaning and light sanding, to promote optimal adhesion and prevent chipping or peeling. Professional painters can help you choose a paint based on your needs and handle the preparation for you to make the process simple.
How long should I wait before using cabinets or furniture after painting over polyurethane?
After painting polyurethane or matte urethane, let the paint dry and cure completely to ensure a durable, chip-resistant finish. While the paint might feel dry to the touch within a few hours (typically 2–4 hours for water-based and 6–10 hours for oil-based paints), it's essential to understand the difference between drying time and curing time.
- Drying time: The time until the paint is no longer tacky and can be lightly touched without transferring.
- Curing time: The much longer period until the paint film hardens completely and reaches its maximum durability.
Acrylic latex paints can take anywhere from a few days to a week or two to fully cure, depending on factors like humidity, temperature, and the thickness of the paint layers. Oil-based paints typically require a longer curing period of 2 to 4 weeks to achieve maximum hardness and durability.
For light-use surfaces, such as display shelves holding lightweight items, it’s generally safe to wait 24 to 48 hours for curing. However, for cabinets, furniture, and surfaces that receive heavier use, you’ll need to wait for the full curing time. Rushing this process can lead to the paint being easily damaged or chipped, or even items sticking to the surface. Patience during the curing phase is key to a long-lasting and beautiful painted finish.
Here’s a basic schedule to follow when painting polyurethane:
- Wait at least 24 to 48 hours before light, careful use.
- Avoid placing heavy or abrasive items for at least one week.
- Ideally, allow 2 to 4 weeks for the paint to fully cure before subjecting the surfaces to regular, heavy use.
For additional information about painting polyurethane, request a free estimate from your local Five Star Painting team today.