Five Star Painting explains safe lead paint removal with these steps.
|
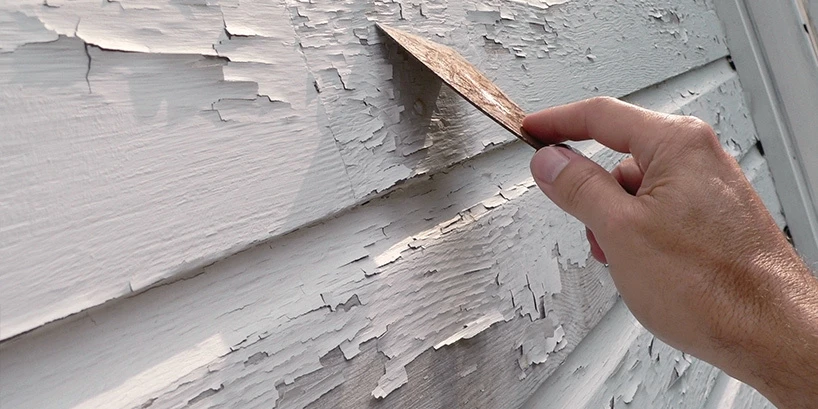
Lead Paint Removal
DIY lead paint removal is risky business if you’re unwilling to take the necessary precautions to prevent exposure to lead dust and paint chips. However, if you’re patient and willing to invest in the time and necessary safety equipment to safely remove lead paint, it can be a DIY job.
This blog covers how to remove lead paint from a wall. If you have window trim or doors with lead paint, you may be better off replacing them.
Otherwise, follow the tips below:
How to Safely Remove Lead Paint
Before you begin, you should assess the condition of the paint. If it is not peeling or chipping, lead paint encapsulation is a safer and less expensive method to remediate lead paint. If removal is required, begin by purchasing the necessary safety equipment.
Lead Paint Removal Supplies
- 6-mil plastic sheeting
- Tape
- HEPA respirator
- Gloves
- Goggles
- Coveralls
- Paint scraper
- Paint scrapers come in many different forms. Look for the one with replaceable blades that you pull towards you to remove paint. A putty knife will not work for this type of paint scraping.
- Power tools with sanding or abrasive attachments
- Chemical paint strippers
- Spray bottle with water
- Wet/dry shop vacuum with HEPA air filter
- TSP (tri-sodium phosphate)
- Bucket
- Sponge
You must use a HEPA respirator rated to filter lead paint dust – a dust mask is not enough! Ideally, you should have a full-face respirator that covers your entire face. In addition, your vacuum must have a HEPA filter to properly filter out the lead dust.
Prepare the Area for Remediation
Everything in the room must be removed or covered with two sheets of 6-mil plastic. To prevent contaminating other rooms, you’ll need to seal off the area with plastic sheeting. Use tape to hang two 6-mil plastic sheets in front of doorways or any area where dust could enter a nearby room. The floor should also be sealed off with two sheets of plastic and taped at the seams and edges to collect dust. HVAC ducts should also be covered and the system turned off during remediation.
Begin Remediation
The key to removing lead paint is to reduce the amount of dust as much as possible. This is accomplished by keeping the area wet and using wet sanding or wet scraping techniques. Use the spray bottle with water to periodically mist the area you’re working on.
Once you’re suited up with the proper safety gear, you can begin. For smaller areas, scraping is adequate. For larger areas, a combination of chemical stripping agents, power tools and paint scrapers is best. The goal is either to remove all the lead paint if you’re not painting with an encapsulant, or remove the paint that is peeling and flaking so you can prepare the surface for encapsulation.
Tips for Removing Lead Paint
- The tool you will use will depend on the condition of the paint, your budget, experience, and the size of the area.
- Paint scrapers are inexpensive, but it takes a long time to cover a large area. If you use one, purchase extra blades and always work with a sharp tool.
- Angle grinders, cordless drills, sanders, and dedicated paint removers can all be used to remove paint. Just be sure to purchase the correct attachment to not mar the wood behind the paint. These tools can damage a wall and cause injury, too. Avoid these if you do not have experience with power tools.
- The safest and least expensive DIY approach to lead paint removal is wet sanding and wet scraping.
- Taking a break or grabbing lunch? You must remove your protective clothing immediately after you exit the room and wash your hands and face thoroughly. Keep and wash these clothes separate from your wardrobe, or better yet, toss them in the trash; lead paint contamination just isn’t worth it.
While you work, use the vacuum to periodically suck up dust and paint chips. A wet/dry shop vacuum with a HEPA filter is perfect. This will help with clean up and remove harmful lead dust from the work area and prevent it from spreading around the room.
Finish Remediation
Don’t take off your safety gear yet. Wrap up remediation by using the vacuum to remove any remaining dust throughout the entire room. Use warm water, TSP, and a sponge to wipe down the remediated areas. Next, remove the protective plastic from any areas that were masked off during remediation and place it in a plastic trash bag, gather and fold the top over, and double tape the top of the bag and place it in a trash bag to prevent spreading the dust on it. Clean the areas that were masked off with the water and TSP to remove any lingering dust.
It’s best to have the area tested for lead following remediation to ensure there is none left behind. You can purchase a kit online or at your local hardware store.
Professional Painting Services
Contact your local Five Star Painting location to see if they offer lead paint remediation services. All Five Star Painting can add a fresh coat of paint once remediation has taken place. Painting the walls after remediating is a lot of work. We’ve collected a list of five reasons not to DIY paint if you still need convincing. Give us a call at (888) 261-3633 request a free estimate online for professional painting services!